
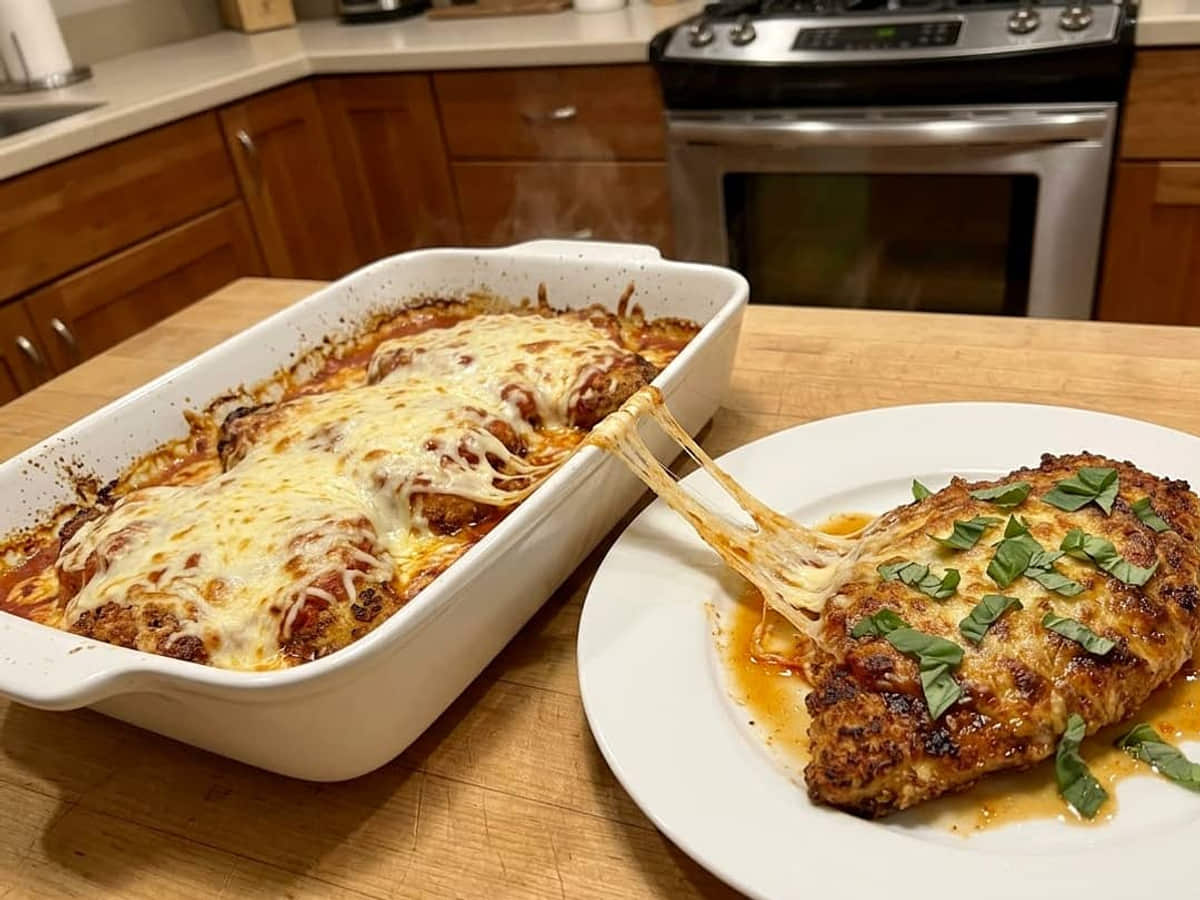
Crispy Chicken Parmesan
” That’s the whole story. This chicken parmesan has been in the regular rotation ever since, and I’ve made it enough times to know exactly where it goes wrong for most people.
The crust turns to mush under the sauce. Every time.
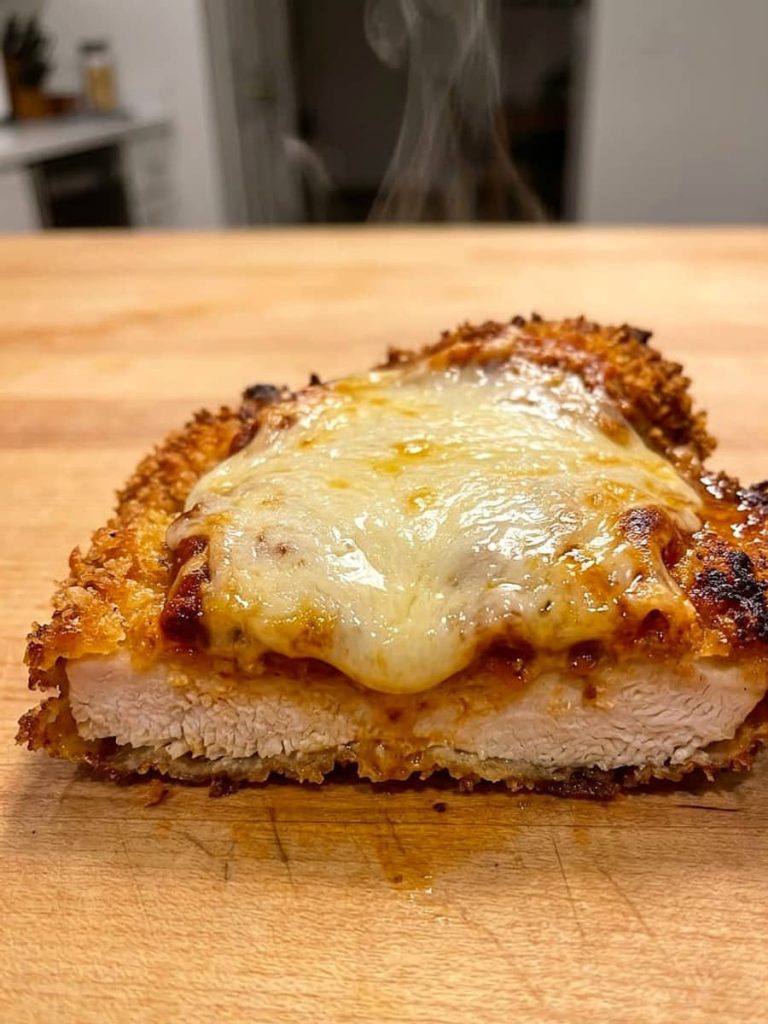
The fix is simple: keep the sauce off the edges. Spoon it over the center of each cutlet and leave a half-inch border bare so the panko stays crisp through the whole bake.
Panko is the other piece. It bakes up feathery and holds its texture under the cheese in a way that fine breadcrumbs just don’t, and that difference is real on the plate.
Prep: 25 minutes · Cook: 30 minutes · Total: about 55 minutes · Serves: 4
How do you keep chicken parmesan crispy under the sauce?
Spread half the marinara on the bottom of the baking dish, then spoon the rest over only the center of each cutlet, leaving the edges bare. The exposed panko stays dry in the oven and holds its crunch. Bake at 425°F so the cheese bubbles fast before the crust has time to soften.
The Method, in Plain English
- Flattening the chicken to 1/3 inch means it finishes cooking in 12 to 15 minutes at 425°F, which is fast enough that the panko crust doesn’t have time to go soft before the cheese bubbles.
- The flour-egg-panko order matters: flour gives the egg something to grip, and without it the whole crumb coat slides off in the hot oil, leaving you with a bare, pale cutlet.
- Mixing Parmesan directly into the panko seasons the crust from the inside and helps it brown deeper and faster than plain breadcrumbs alone.
The first time I made this I skipped the flour step because I was in a hurry. Half the breading ended up stuck to the pan.
I haven’t skipped it since.
Why This One’s Worth Making
- The crust stays genuinely crisp, even after the cheese melts over it.
- Everything goes into one 9×13-inch baking dish, so cleanup is fast.
- The whole dinner is on the table in under an hour, start to finish.
- Kids who won’t touch plain chicken will ask for seconds.
What Goes Into Chicken Parmesan
- 1 1/2 lbs boneless skinless chicken breasts (2 large)
- 1 tsp salt
- 1/2 tsp black pepper
- 1/2 cup all-purpose flour
- 2 large eggs, beaten
- 1 cup panko breadcrumbs
- 1/2 cup grated Parmesan cheese
- 1 tsp dried oregano
- 1/2 tsp dried thyme
- Olive oil for frying (enough to coat the pan generously)
- 2 cups marinara sauce, divided
- 6 oz whole milk mozzarella, shredded (about 1 1/2 cups)
- 2 tbsp fresh basil, torn, for finishing
A Few Notes on the Ingredients
Panko breadcrumbs are worth seeking out here. They’re coarser and drier than fine Italian breadcrumbs, which means they fry up with more air in them and hold their texture under the sauce.
Fine crumbs brown faster in the pan but turn pasty once the sauce and cheese go on top. Natasha’s Kitchen uses fine Italian crumbs, but for a crust that’s still crisp when it hits the table, panko is the better call.
Whole milk mozzarella melts into thick, stretchy pools that hold their shape on the plate. Part-skim works in a pinch, but it releases more water and can make the top of the dish look watery.
If you want something different, fontina melts even smoother and has a nuttier flavor that works really well here.
For the marinara, a good jar is completely fine. Two cups is a small enough amount that making it from scratch doesn’t add much, and a jar you already like will taste good.
Pick one that isn’t too thin or too sweet, since both of those will soak into the crust faster.
Step-by-Step Directions
- Prep the chicken. Halve each breast horizontally to make four thin cutlets, then place them between sheets of plastic wrap and pound to an even 1/3-inch thickness. Season both sides with the salt and pepper before you do anything else, so the seasoning reaches the meat, not just the coating.
- Set up the breading station. Line up three shallow dishes: flour in the first, beaten eggs in the second, and the panko mixed with the Parmesan, oregano, and thyme in the third. Having everything in order before the oil goes on the stove keeps the process moving without scrambling.
- Bread the cutlets. Dredge each cutlet in flour and shake off the excess, then dip it fully in the egg, letting the extra drip off, then press it firmly into the panko mixture on both sides. The coating should look even and dry, with no wet patches showing through.
- Fry the cutlets. Pour enough olive oil into a large skillet to coat the bottom generously and heat over medium-high until the oil shimmers. Add the cutlets without crowding and fry for about 3 minutes per side, until the crust is a deep, even golden brown. The chicken won’t be cooked through yet, and that’s fine.
- Assemble the dish. Preheat your oven to 425°F. Spread 1 cup of the marinara across the bottom of a 9×13-inch baking dish. Lay the fried cutlets in a single layer on top. Spoon the remaining 1 cup of sauce over the center of each cutlet only, leaving the edges bare so they stay crisp in the oven.
- Add the cheese and bake. Scatter the shredded mozzarella evenly over the sauced portion of each cutlet. Slide the dish into the oven and bake for 12 to 15 minutes, until the cheese is bubbling and the center of the thickest cutlet reads 165°F on an instant-read thermometer, which is the USDA’s safe internal temperature for poultry.
- Finish and serve. Pull the dish from the oven and scatter the torn fresh basil over the top. Let it sit for two or three minutes before serving so the cheese firms up just enough to hold when you lift a cutlet. Serve straight from the baking dish.

What I’ve Learned Making This Chicken Parmesan
- Salt the chicken before it goes into the flour, not after breading. Salt on the outside of a crumb coat sits on the surface and never reaches the meat.
- You can bread the cutlets up to 4 hours ahead and hold them uncovered on a wire rack in the fridge. A dry surface fries up crisper than a damp one.
- Chicken tenderloins work in place of halved breasts and skip the pounding step entirely. They cook faster, so check the temperature at the 10-minute mark rather than going by the clock.
- Don’t crowd the skillet when you fry. If the cutlets touch, they steam instead of fry, and the crust comes out pale and soft. Work in two batches if you need to.
- I still don’t measure the olive oil for frying, and I’m not going to start. You want the bottom of the pan covered, about 1/4 inch deep, and you’ll know it’s ready when a pinch of panko dropped in sizzles immediately.
- More sauce than 2 cups total and the crust turns to paste before the plate reaches the table. Stick with the amounts here.
Storage and Make-Ahead
Leftover chicken parmesan keeps in an airtight container in the fridge for up to 3 days. The crust will soften overnight, which is just the nature of a sauced, breaded dish.
To reheat, put the cutlets in a 375°F oven for about 10 minutes, uncovered, until the cheese is melted and the center is hot. The oven brings back more crispness than a microwave, which just steams everything.
This dish can be frozen after baking. Wrap individual cutlets tightly, freeze for up to 2 months, and thaw overnight in the fridge before reheating in the oven.
Don’t freeze with the fresh basil on top.
Rounding Out the Meal
- Spaghetti with olive oil and garlic is the obvious pairing, and it works because the pasta soaks up any extra sauce from the plate without competing with the chicken.
- A simple green salad with a sharp vinaigrette cuts through the richness of the cheese and gives the meal some brightness.
- Garlic bread is good for mopping up the marinara that pools in the bottom of the dish, and it takes five minutes to put together.
- Roasted broccoli or zucchini rounds out the plate with something green that holds up to the oven heat and doesn’t need a separate pan.
Tools You’ll Need
- A large skillet, at least 12 inches wide, so you can fry two cutlets at a time without crowding them.
- A 9×13-inch baking dish, ceramic or glass, deep enough to hold the sauce without it bubbling over the sides.
- A meat mallet or a small heavy skillet for pounding the cutlets to an even thickness, which matters more than most people think.
- A wire rack that fits inside a rimmed baking sheet, useful for holding breaded cutlets in the fridge before frying.
- An instant-read thermometer, the only reliable way to know the chicken has hit 165°F without cutting into it and losing the juices.
FAQ
Can I make chicken parmesan ahead of time? You can bread the cutlets up to 4 hours ahead and refrigerate them uncovered on a rack. Fry and bake them right before dinner for the best crust. Fully assembled and baked, it reheats well but the crust won’t be as crisp as it is fresh out of the oven.
Why does the breading fall off chicken parmesan? The most common reason is skipping the flour step. Flour gives the egg a dry surface to cling to, and without it the panko coat slides off in the hot oil. Pressing the panko firmly onto the cutlet and letting any excess egg drip off before breading also helps.
What’s the right internal temperature for chicken parmesan? The chicken needs to reach 165°F at the center of the thickest piece, which is the USDA’s minimum safe temperature for poultry. An instant-read thermometer is the only way to check this accurately without cutting the cutlet open.
Can I use chicken thighs instead of breasts? Boneless skinless thighs work, but they’re thicker and uneven, so pound them to a consistent 1/3 inch just like the breasts. They’ll take a few extra minutes in the oven and the flavor is a little richer.
Do I have to fry the chicken first, or can I just bake it? Frying first is what gives the crust its color and crunch. Baking from raw produces a pale, soft coating that doesn’t hold up under the sauce. The pan-fry step takes about 6 minutes total and it’s worth every second.
If You Liked This One
- Classic Beef Chili
- Classic Beef Stew
- Classic Ground Beef Tacos
- Classic Meatloaf with Brown Sugar Glaze
- Classic Pot Roast
- Classic Spaghetti and Meatballs
- Creamy Baked Mac and Cheese
- Homemade Chicken Noodle Soup
- Homemade Chicken Pot Pie
- Simple Whole Roast Chicken
Crispy Chicken Parmesan
Course: DinnerCuisine: American4
servings25
minutes30
minutesIngredients
1 1/2 lbs boneless skinless chicken breasts (2 large)
1 tsp salt
1/2 tsp black pepper
1/2 cup all-purpose flour
2 large eggs, beaten
1 cup panko breadcrumbs
1/2 cup grated Parmesan cheese
1 tsp dried oregano
1/2 tsp dried thyme
Olive oil for frying (enough to coat the pan generously)
2 cups marinara sauce, divided
6 oz whole milk mozzarella, shredded (about 1 1/2 cups)
2 tbsp fresh basil, torn, for finishing
Directions
- Prep the chicken. Halve each breast horizontally to make four thin cutlets, then place them between sheets of plastic wrap and pound to an even 1/3-inch thickness. Season both sides with the salt and pepper before you do anything else, so the seasoning reaches the meat, not just the coating.
- Set up the breading station. Line up three shallow dishes: flour in the first, beaten eggs in the second, and the panko mixed with the Parmesan, oregano, and thyme in the third. Having everything in order before the oil goes on the stove keeps the process moving without scrambling.
- Bread the cutlets. Dredge each cutlet in flour and shake off the excess, then dip it fully in the egg, letting the extra drip off, then press it firmly into the panko mixture on both sides. The coating should look even and dry, with no wet patches showing through.
- Fry the cutlets. Pour enough olive oil into a large skillet to coat the bottom generously and heat over medium-high until the oil shimmers. Add the cutlets without crowding and fry for about 3 minutes per side, until the crust is a deep, even golden brown. The chicken won’t be cooked through yet, and that’s fine.
- Assemble the dish. Preheat your oven to 425°F. Spread 1 cup of the marinara across the bottom of a 9×13-inch baking dish. Lay the fried cutlets in a single layer on top. Spoon the remaining 1 cup of sauce over the center of each cutlet only, leaving the edges bare so they stay crisp in the oven.
- Add the cheese and bake. Scatter the shredded mozzarella evenly over the sauced portion of each cutlet. Slide the dish into the oven and bake for 12 to 15 minutes, until the cheese is bubbling and the center of the thickest cutlet reads 165°F on an instant-read thermometer, which is the USDA’s safe internal temperature for poultry.
- Finish and serve. Pull the dish from the oven and scatter the torn fresh basil over the top. Let it sit for two or three minutes before serving so the cheese firms up just enough to hold when you lift a cutlet. Serve straight from the baking dish.


